 xkorfun / dockpin
dockpin
Keep the Dock on one display.
Dock을 한 화면에 고정합니다.
With more than one monitor, macOS moves the Dock to whichever screen you push the pointer against the bottom of, and sometimes after sleep all by itself. There is no setting to stop it. dockpin is.
모니터가 여러 대면 macOS는 커서를 아래쪽에 밀어붙인 화면으로 Dock을 옮기고, 절전에서 깨어날 때는 저절로 옮기기도 합니다. 이걸 막는 설정은 없습니다. dockpin이 그 설정입니다.
brew install --cask esteban-eg-kim/tap/dockpin
Pick a display
화면을 고르면 끝
Choose it in the menu bar and the Dock moves there at once.
메뉴바에서 고르면 Dock이 바로 그 화면으로 옮겨 갑니다.
No more jumping
더 이상 안 넘어감
Pushing against the bottom of another screen no longer pulls the Dock over. The pointer moves as usual.
다른 화면 아래쪽에 커서를 밀어도 Dock이 따라오지 않습니다. 커서는 평소처럼 움직입니다.
Back after sleep
절전 뒤에도 제자리
When macOS moves the Dock as displays wake, dockpin brings it home a few seconds later.
모니터가 깨어나며 macOS가 Dock을 옮겨도 몇 초 뒤 다시 데려옵니다.
Hold ⌥ to move it
⌥ 누르면 이동 허용
Want the Dock somewhere else for a moment? Hold Option and push, the way you always did.
잠깐 다른 화면에 두고 싶으면 Option을 누른 채 평소처럼 밀면 됩니다.
Unplug-aware
모니터를 뽑아도
Pick a fallback for when the pinned display is gone. Plug it back in and the Dock returns.
고정한 화면이 빠졌을 때 쓸 화면을 정해 두면, 다시 꽂는 순간 Dock이 돌아옵니다.
One permission, no network
권한 하나, 네트워크 없음
Needs only Accessibility. Collects nothing, sends nothing, and the source is open.
손쉬운 사용 권한 하나면 됩니다. 아무것도 모으거나 보내지 않고, 소스가 공개되어 있습니다.
Only the edges that matter
막을 곳만 막습니다
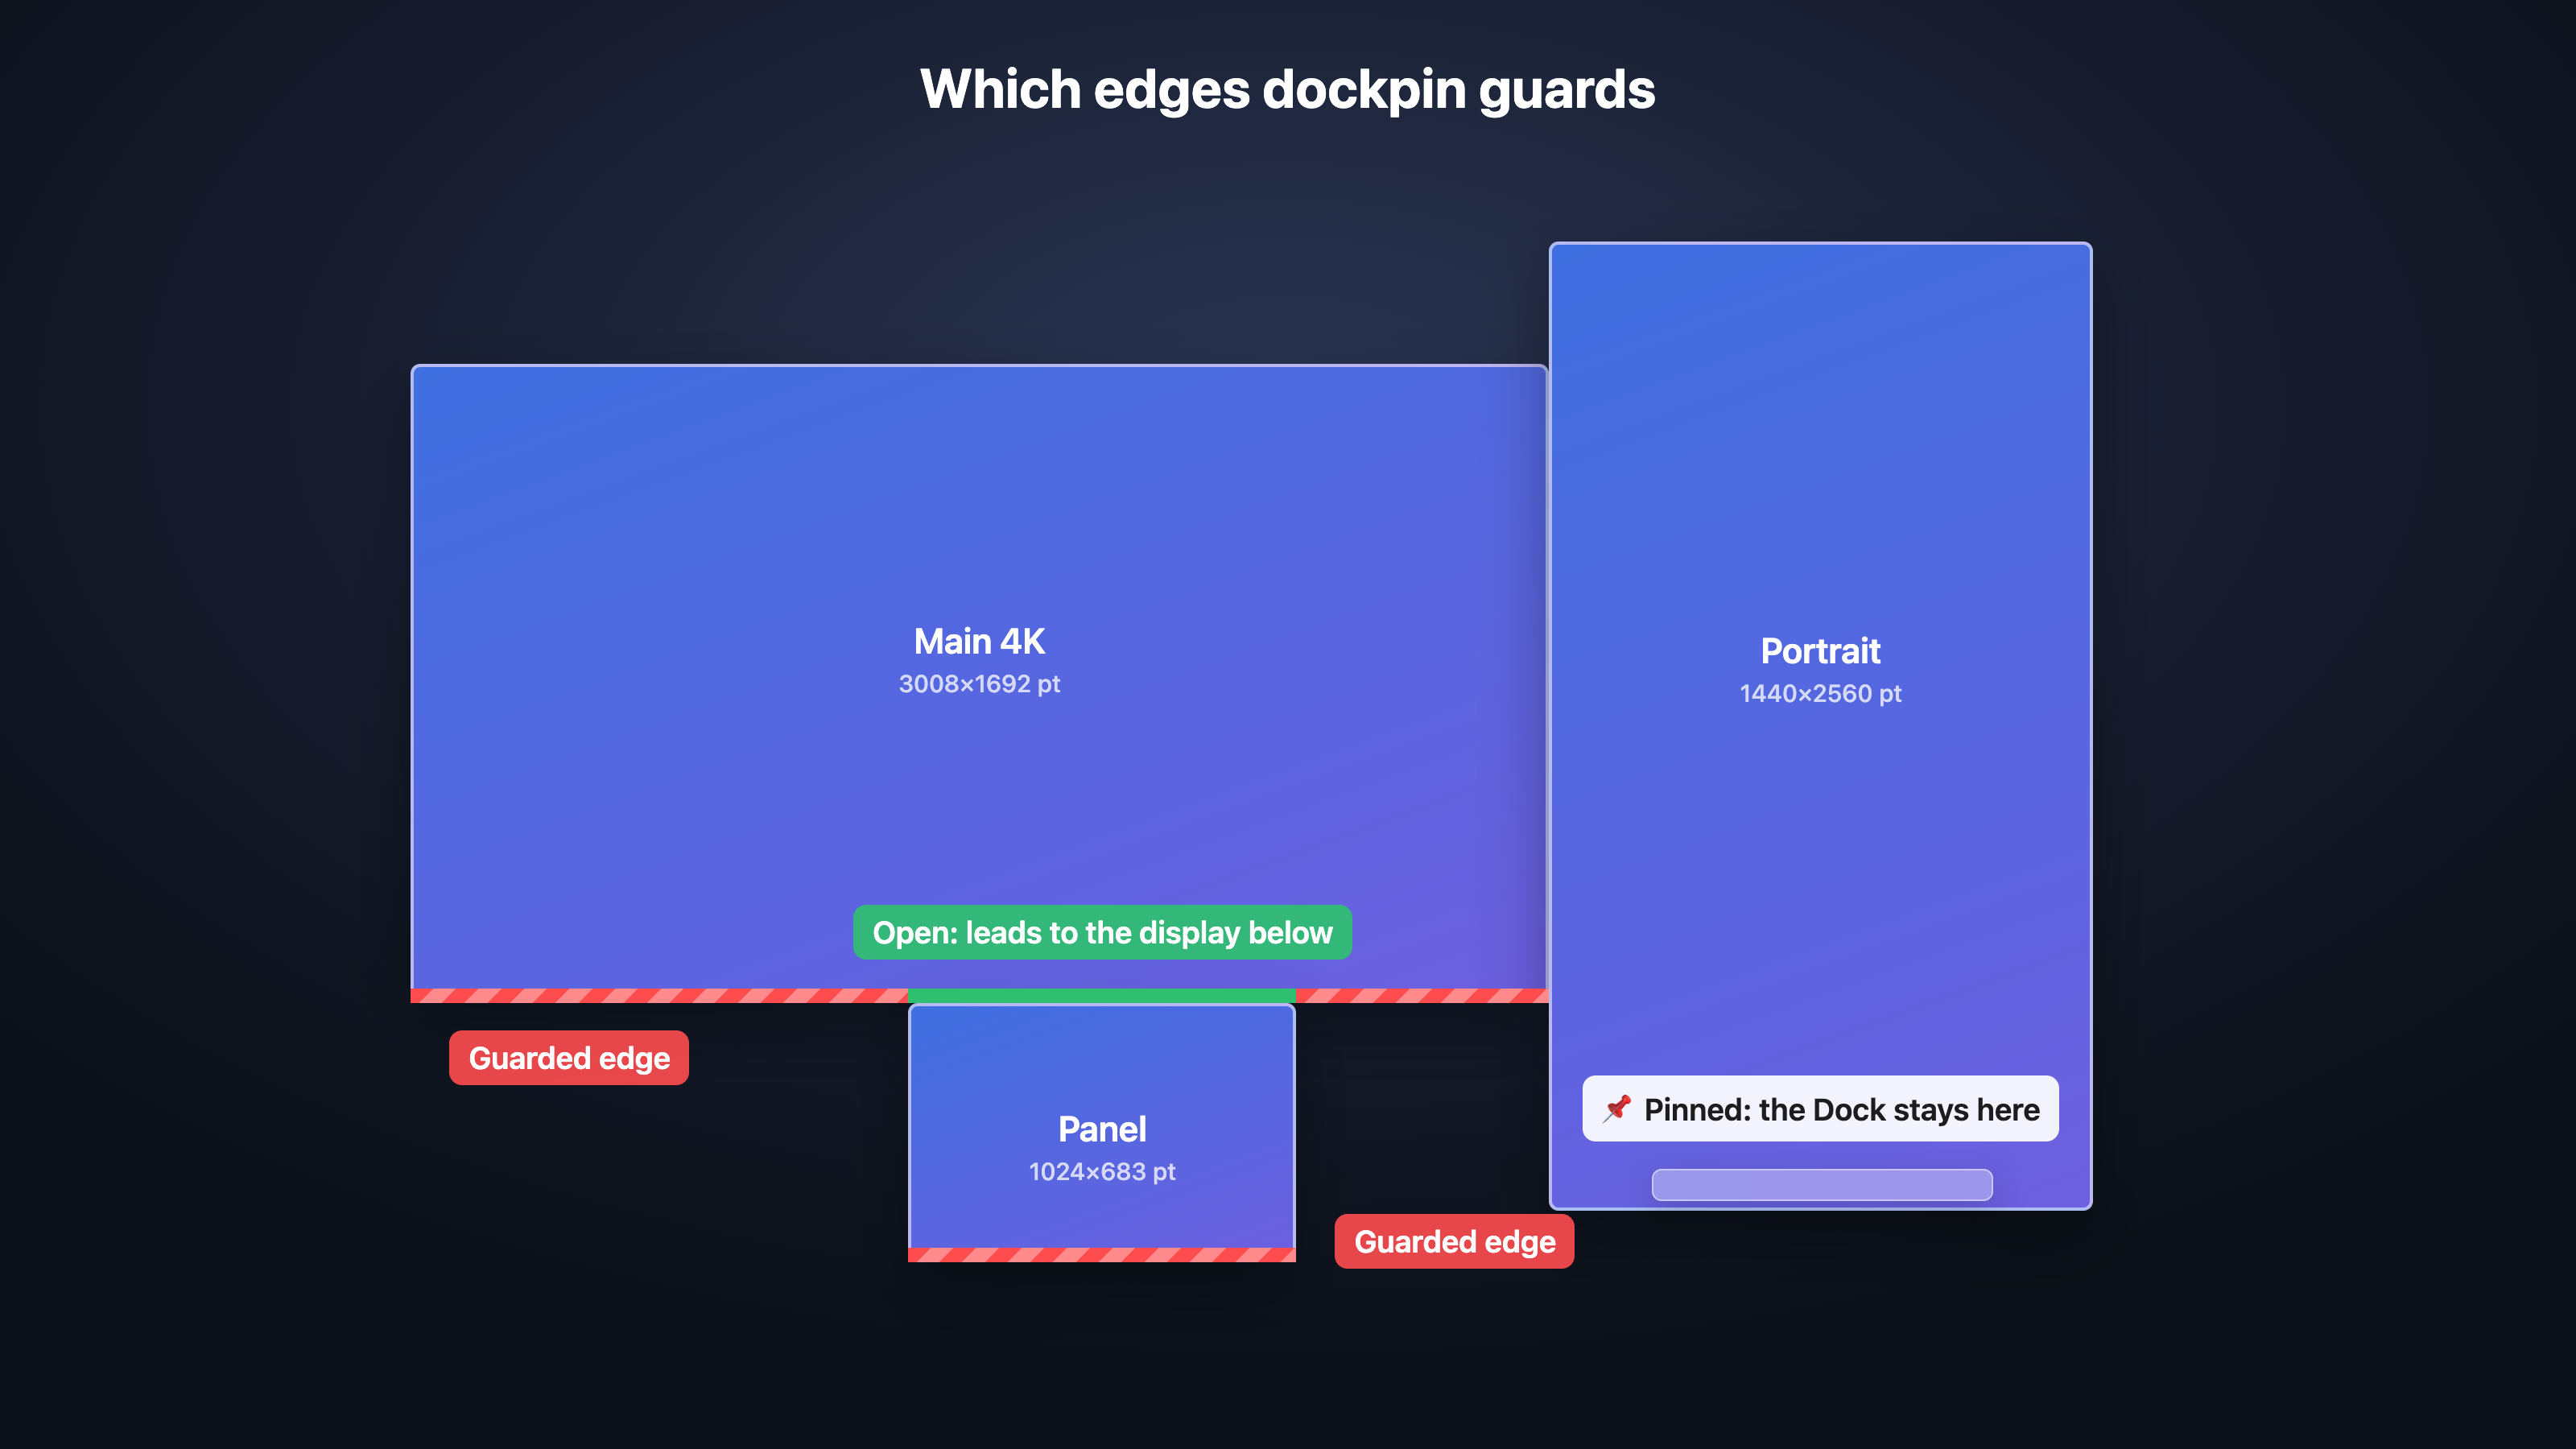
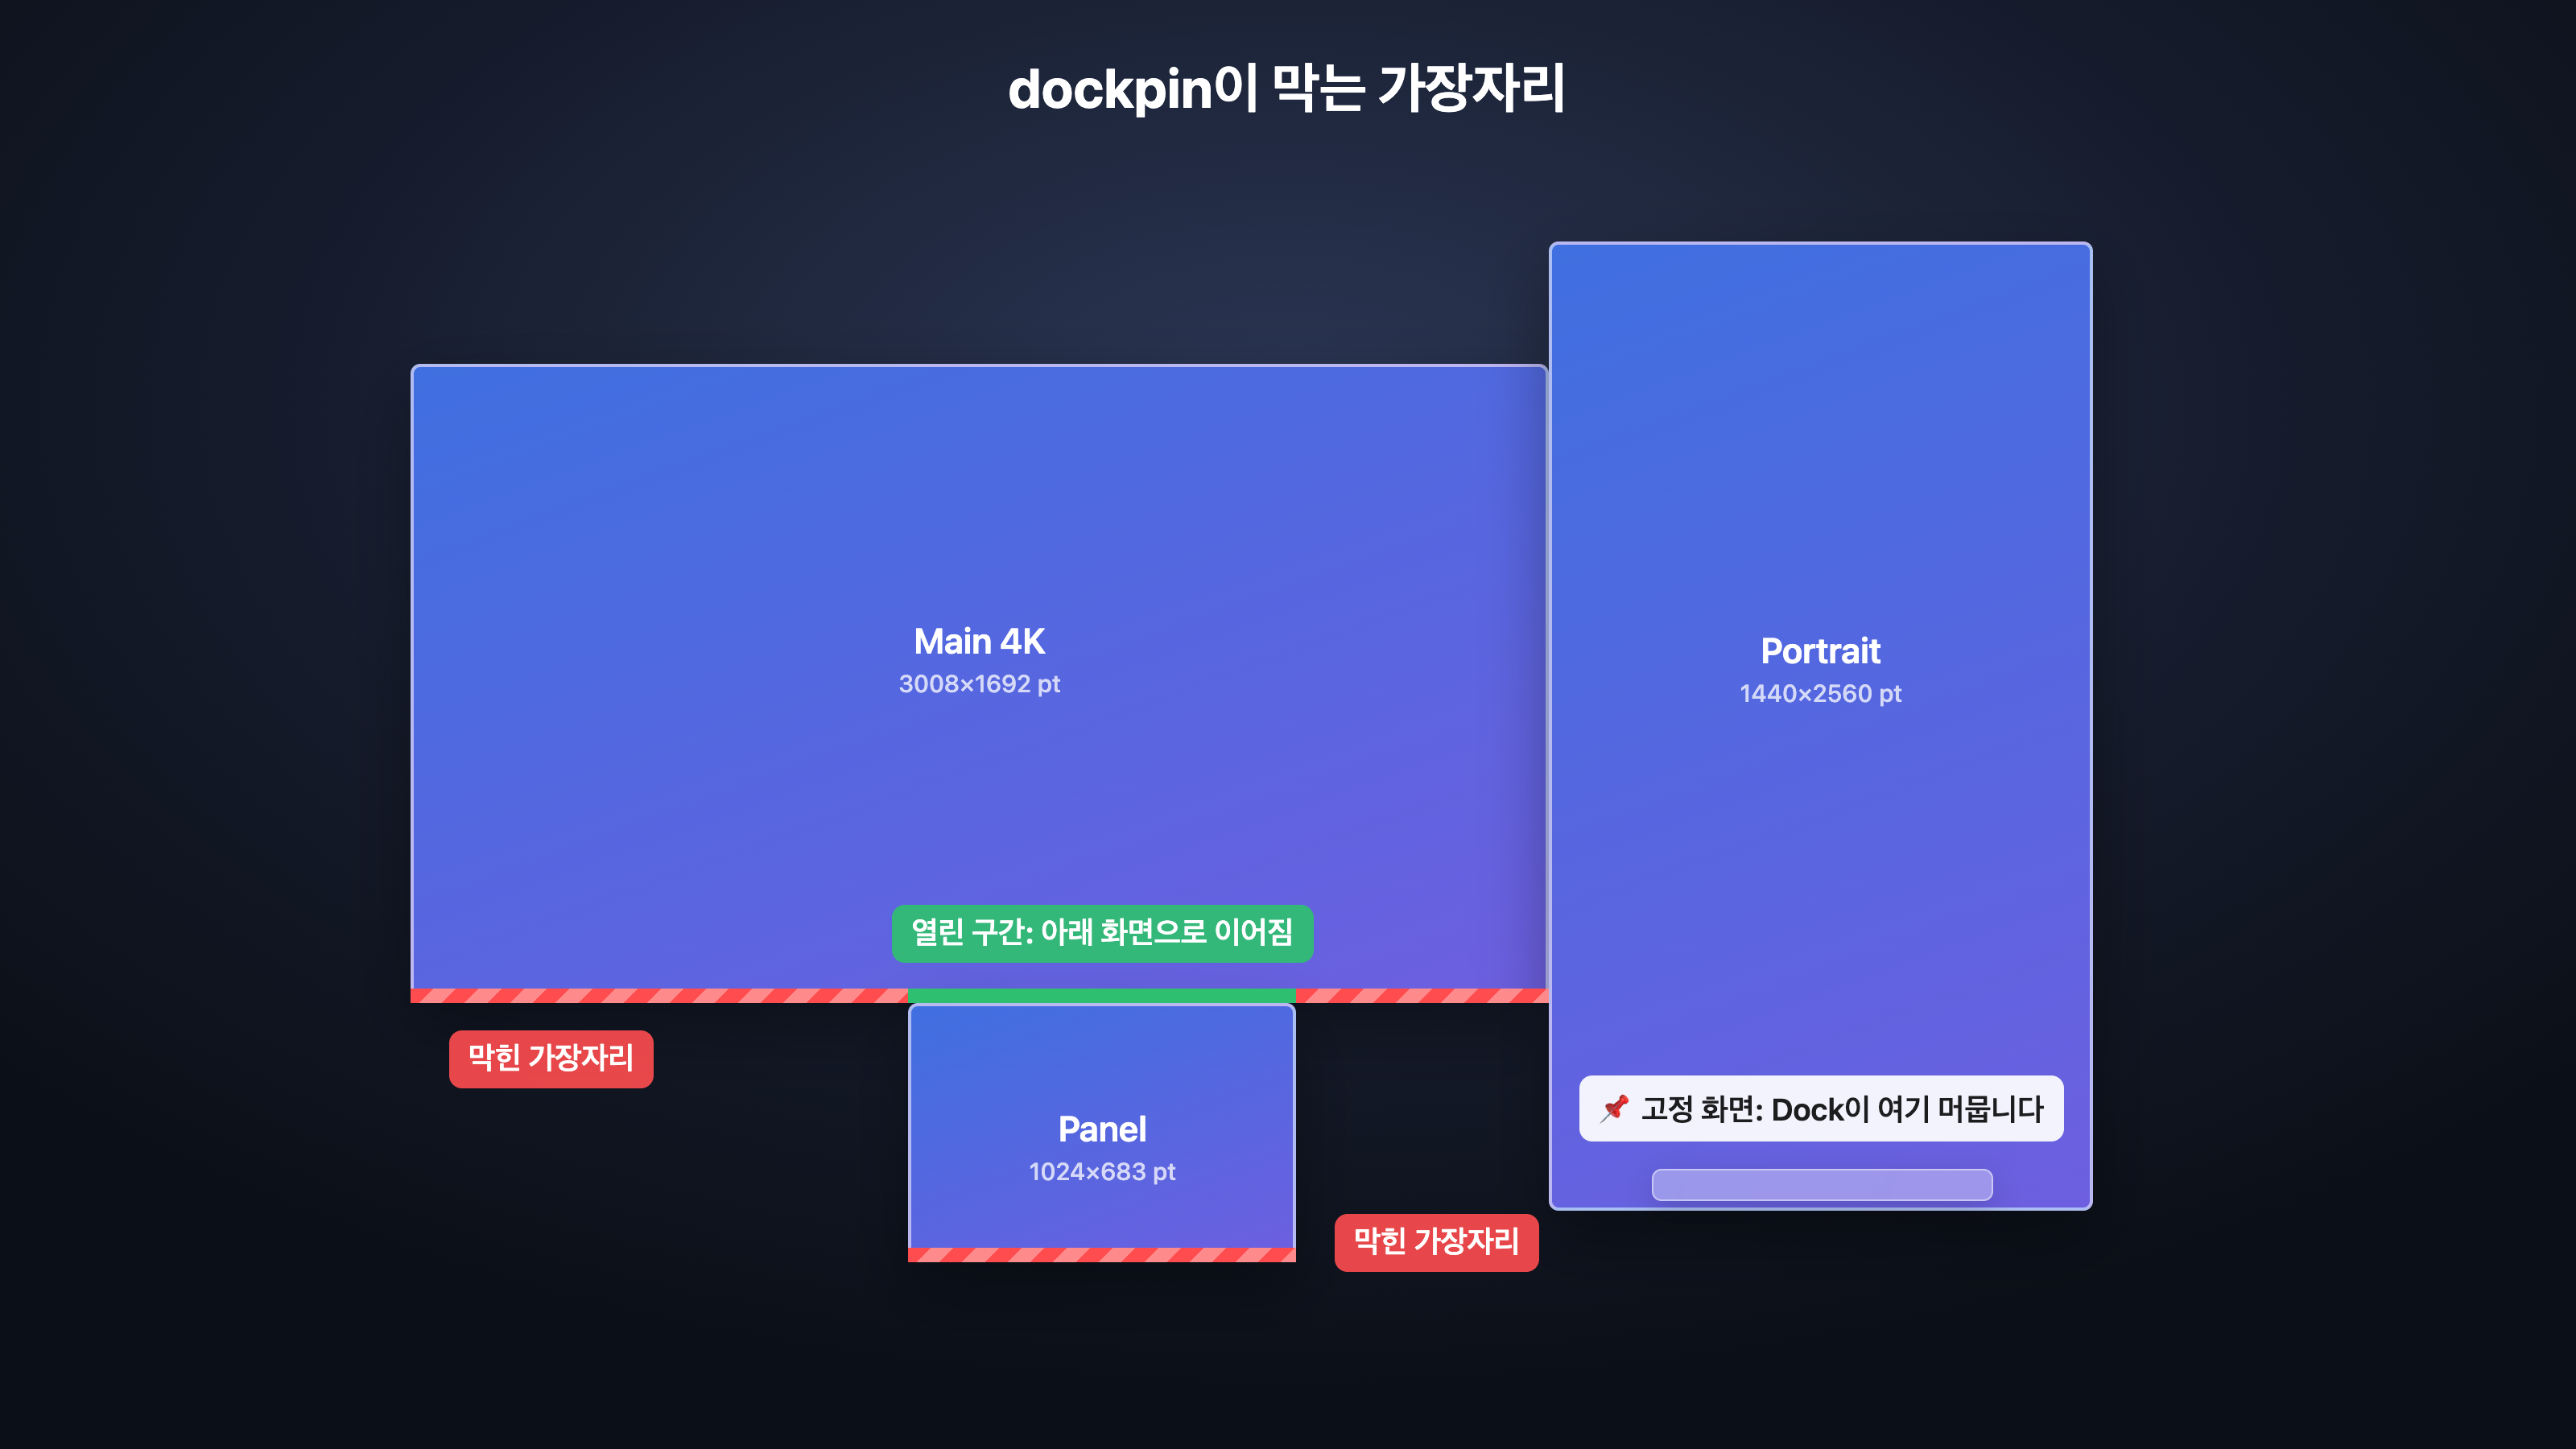
dockpin guards the outer stretch of each other display's Dock edge. Where screens touch, the pointer crosses over as usual, so stacked monitors keep working.
다른 화면의 Dock 쪽 가장자리 중 바깥 구간만 막습니다. 화면끼리 맞닿은 곳은 그대로 지나갈 수 있어서, 위아래로 쌓은 모니터도 평소처럼 씁니다.
Lives in the menu bar
메뉴바에 조용히
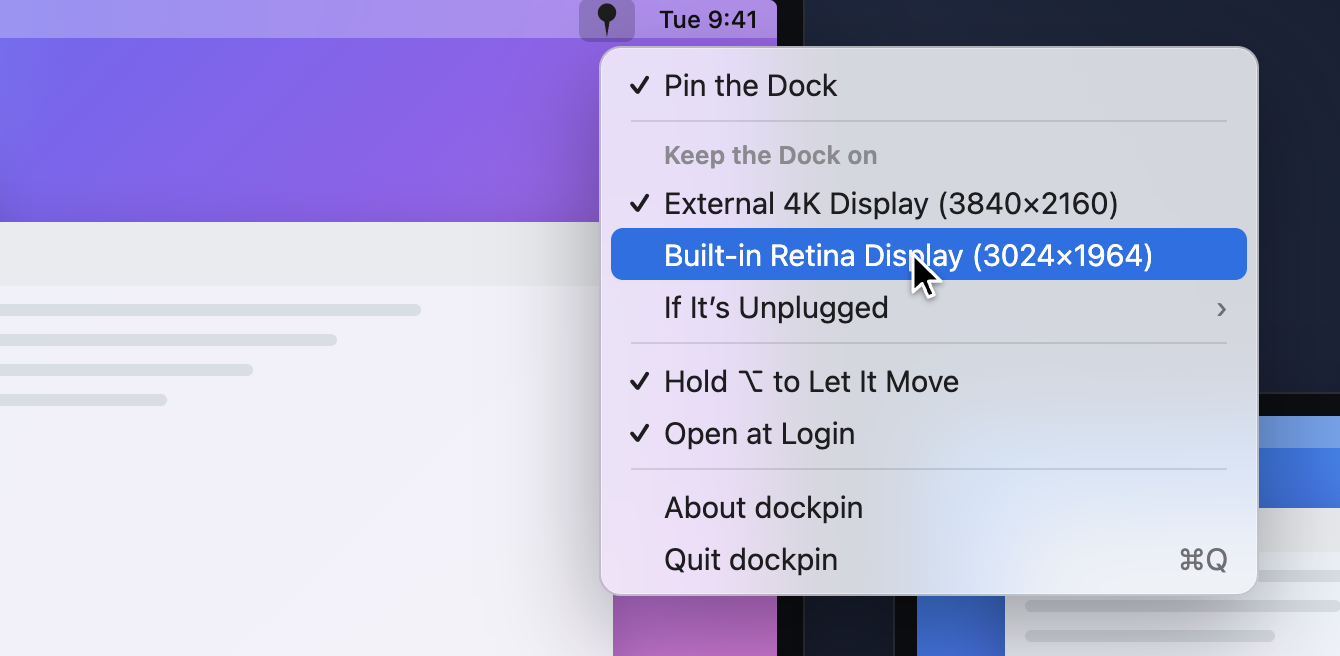
Turn it on or off, choose the display, set the fallback, open at login. That's the whole app.
켜고 끄기, 화면 고르기, 대체 화면, 로그인 시 실행. 앱 전체가 이 메뉴 하나입니다.
Get started
시작하기
Install with Homebrew, open dockpin, and allow Accessibility when it asks. The manual covers the rest, from the menu to troubleshooting.
Homebrew로 설치하고 dockpin을 열어 손쉬운 사용 권한을 허용하면 끝입니다. 메뉴부터 문제 해결까지는 설명서에 있습니다.