 xkor
dockpin manual
dockpin keeps the macOS Dock on the display you choose. This manual covers installing it, the menu, how it decides which edges to guard, and what to do when something looks off.
Install
Homebrew (recommended):
brew install --cask esteban-eg-kim/tap/dockpinBy hand: download dockpin-x.y.z.zip from Releases, unzip it, move dockpin.app to /Applications, then run once in Terminal:
xattr -dr com.apple.quarantine /Applications/dockpin.appdockpin is signed with its own certificate but not notarized by Apple (that needs a paid developer account). Without the line above, macOS says the app "can't be opened". Homebrew does this step for you.
First launch: the one permission
Open dockpin. A pin appears in the menu bar and a welcome window asks for one permission.
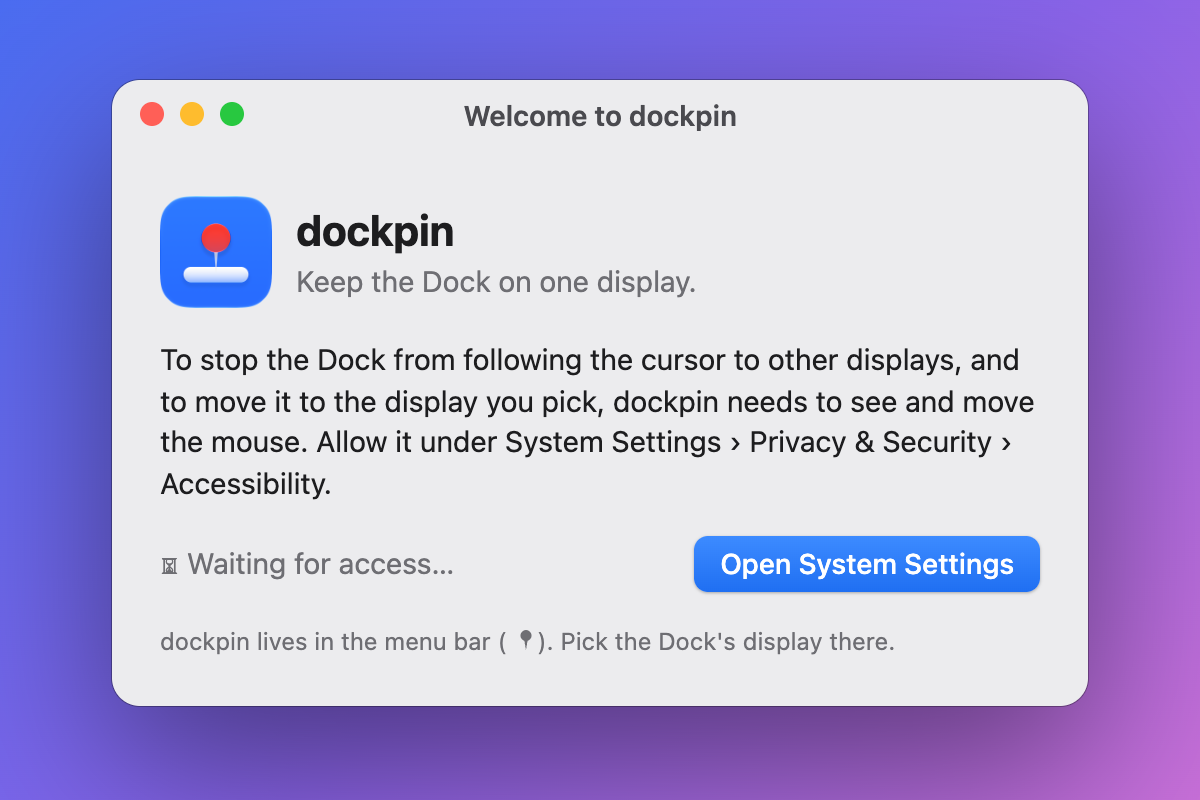
- Click Open System Settings.
- Turn on dockpin in the list:
- macOS 13–26: Privacy & Security › Accessibility
- macOS 27: Privacy & Security › Device Control and Data Access
- Come back. Within a second the window says Access allowed. Click Done.
That is the only permission dockpin needs. It does not need Input Monitoring; that permission is for reading the keyboard, which dockpin never does.
On first launch dockpin pins the Dock to the display it is on right now.
The menu
Click the pin in the menu bar.
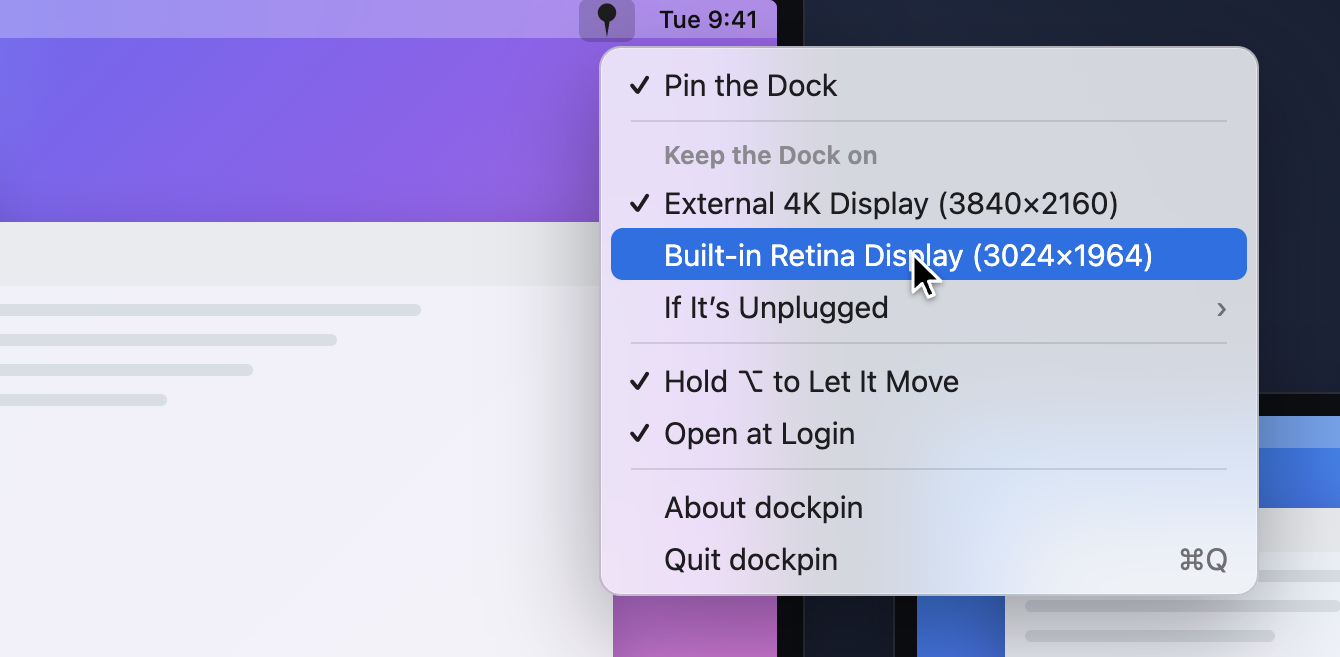
| Item | What it does |
|---|---|
| Pin the Dock | Turns dockpin on or off. Off, the menu bar icon shows a crossed-out pin and the Dock behaves as macOS normally does. |
| Keep the Dock on | Lists your displays by name and resolution. The checked one is where the Dock lives. Picking another moves the Dock there at once. |
| If It's Unplugged | Where the Dock goes while the pinned display is disconnected: Leave the Dock Where It Is (default), or a display of your choice. When the pinned display comes back, so does the Dock. |
| Hold ⌥ to Let It Move | While on, holding Option lets the Dock move the usual way. |
| Open at Login | Starts dockpin when you log in. |
| ⚠️ Allow Accessibility Access… | Shown only while the permission is missing. Opens the right page in System Settings. |
| About dockpin / Quit dockpin | Version info / quit (⌘Q). |
The menu bar icon tells you the state at a glance: a solid pin means dockpin is guarding; a crossed-out pin means it is off or still waiting for permission.
Moving the Dock
There are two ways to put the Dock on another display.
Pick it in the menu. Choose the display under Keep the Dock on. For about half a second the pointer disappears; dockpin runs it into that display's Dock edge, the Dock follows, and the pointer comes back to where it was. Don't move the mouse in that half second; dockpin ignores it anyway.
Hold ⌥ and push. With Hold ⌥ to Let It Move on, hold Option and push the pointer against the bottom of another display. The Dock moves the way it always did. This does not change the pinned display: it is a one-off.
dockpin also brings the Dock home on its own whenever it ends up somewhere else: when you turn Pin the Dock back on, when dockpin starts, when the pinned display is plugged back in, and when macOS moves the Dock by itself. macOS does that when displays wake from sleep: it may put the Dock on whichever display wakes first. No mouse is involved, so it can't be blocked, but dockpin checks every two seconds and fetches the Dock back a few seconds after the displays settle.
It leaves the Dock alone after an Option move, since you moved it on purpose, and while a mouse button is held. It never touches the pointer while the screen is locked, the displays are asleep, or you are switched to another user; after you unlock, it waits a second and then checks. If three tries in a row don't bring the Dock back, dockpin stops trying until the displays or its settings change, rather than keep taking over the pointer.
When it does move the Dock, it puts the pointer back exactly where it was, and tells the Dock so, so its icons don't stay magnified.
Which edges are guarded
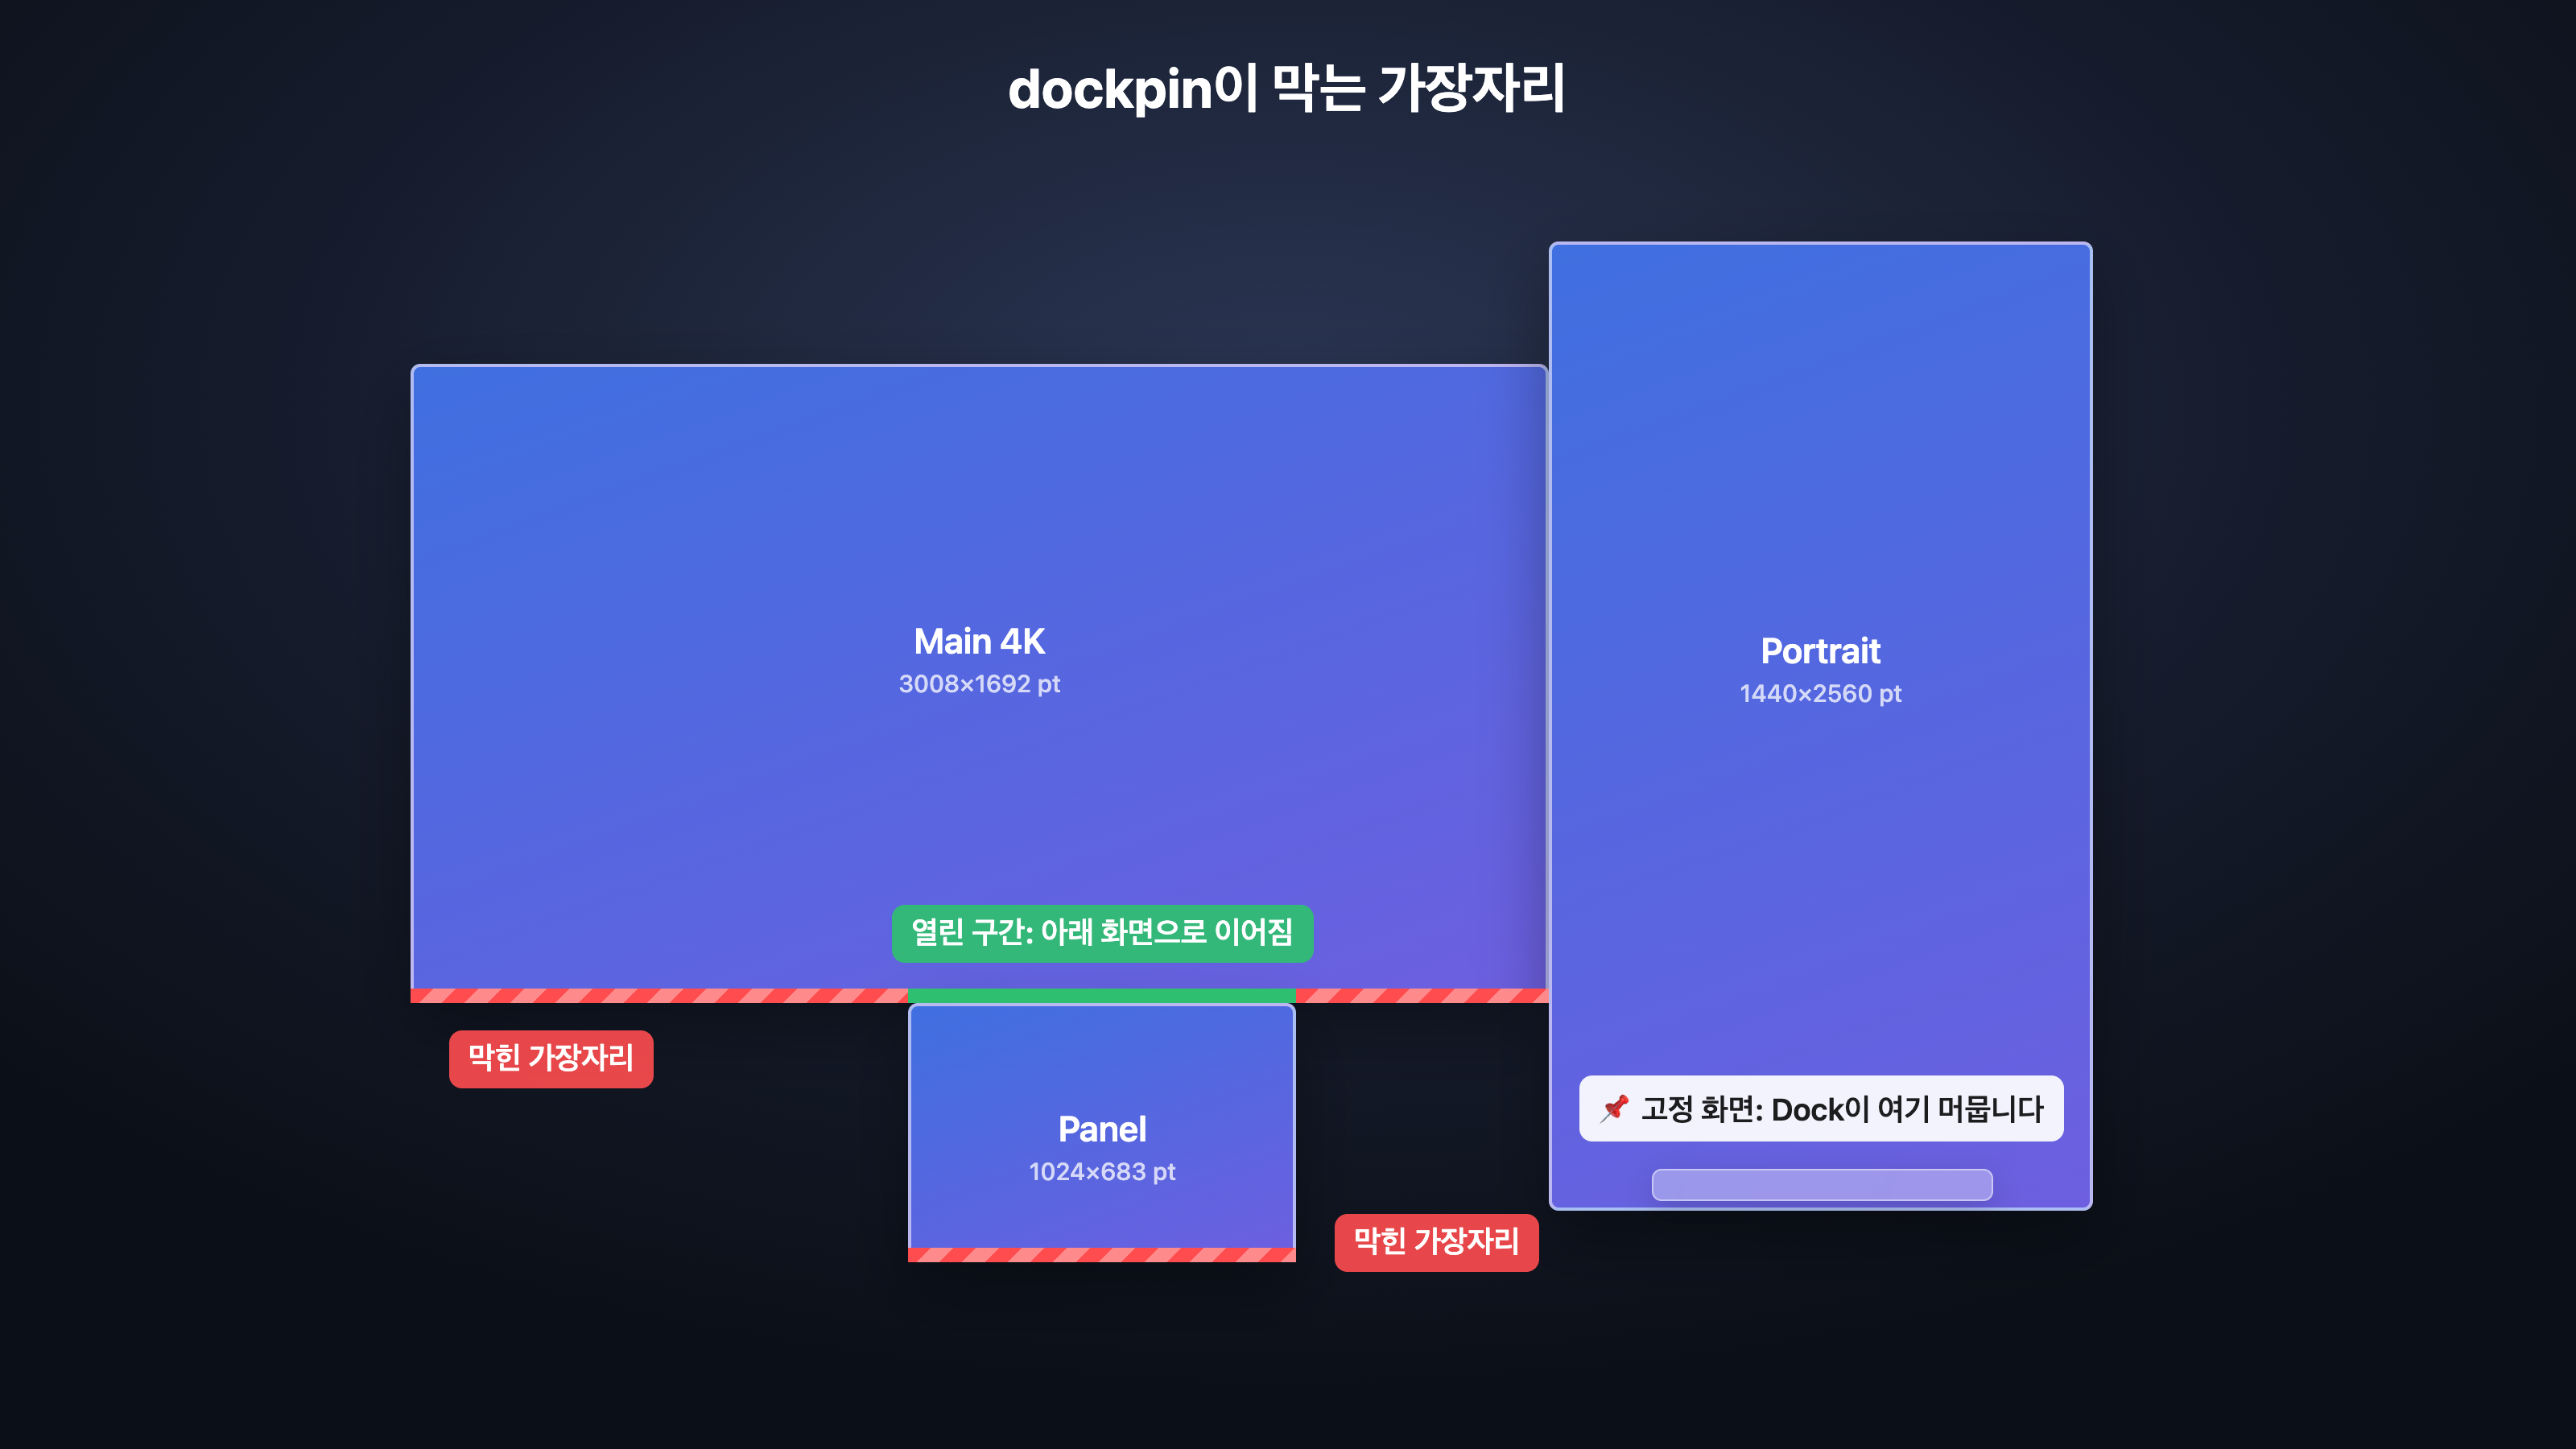
The Dock moves when the pointer presses against a display's Dock edge. dockpin watches mouse movement and drops the moves that land in a thin strip (4 points) along that edge, on every display except the pinned one. The pointer still moves normally; the Dock just never sees the push.
Only the outer parts of an edge are guarded. Where another display is attached beyond the edge, the pointer crosses over as usual:
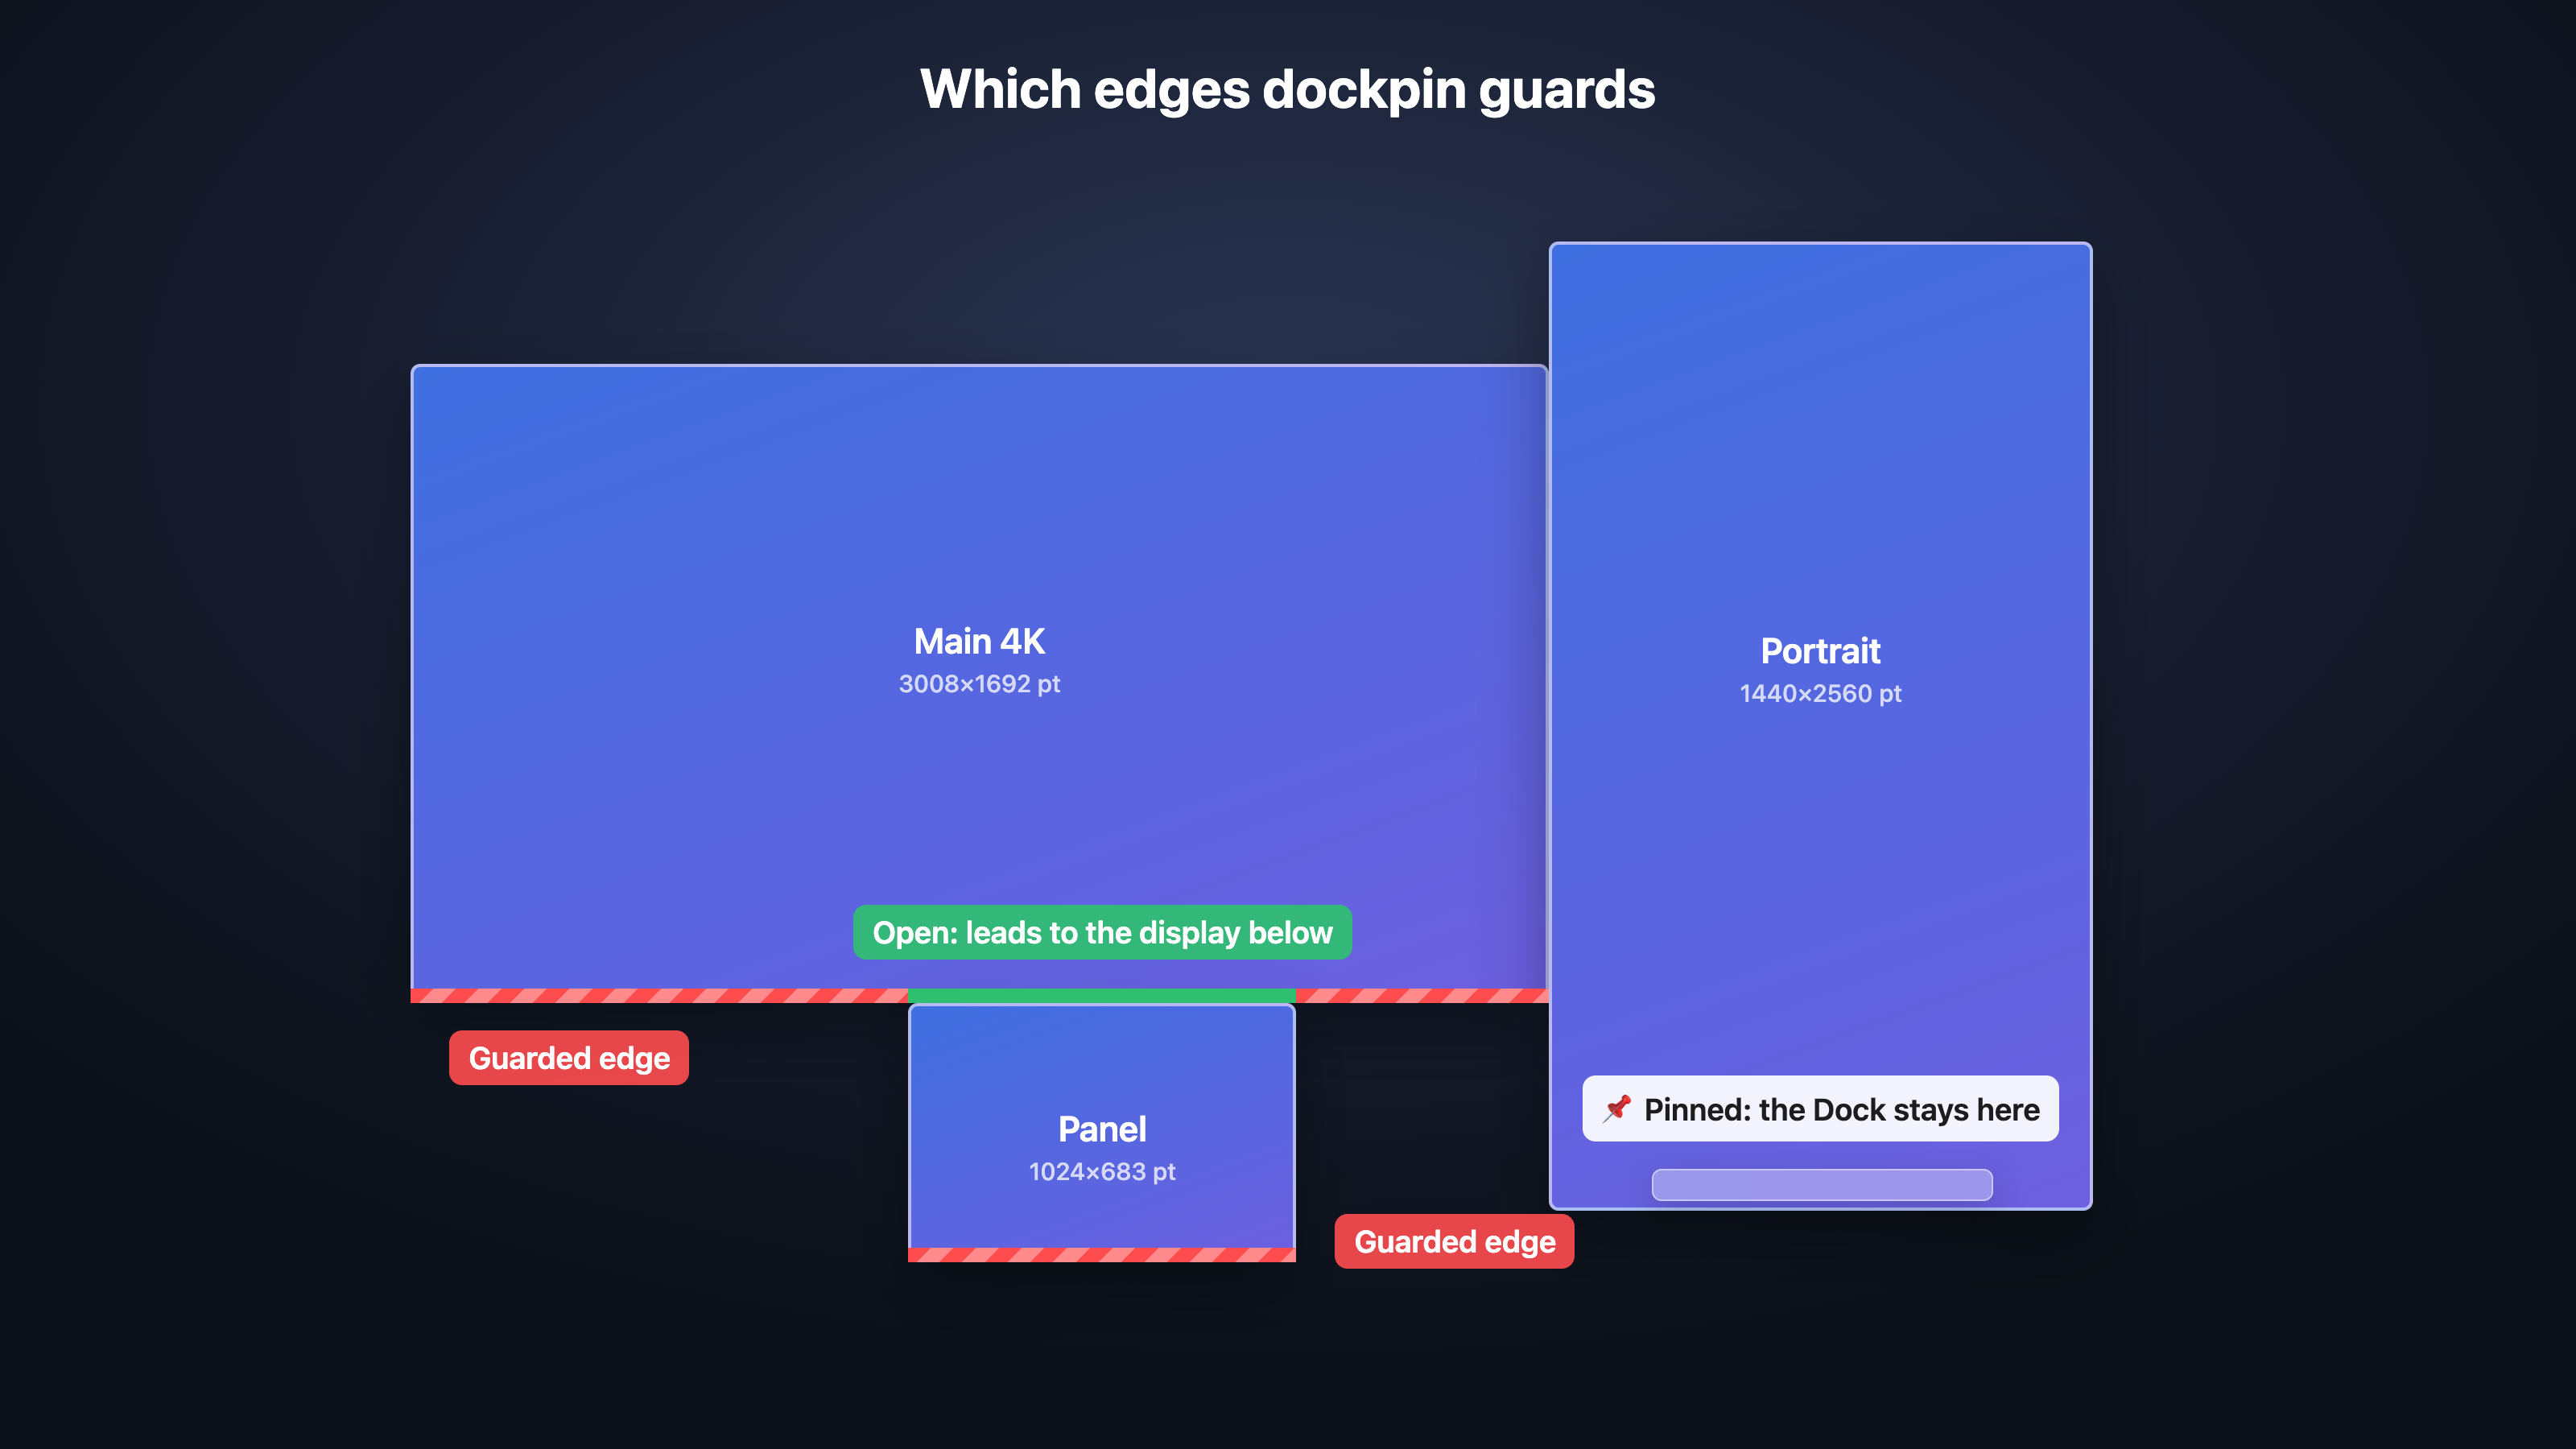
Here the Dock is pinned to the portrait display. The bottom of the main display is guarded except the stretch above the small panel, which stays open so you can move the pointer down into it. The panel's own bottom is guarded.
If your Dock is on the left or right side (System Settings › Desktop & Dock › Position on screen), dockpin guards the left or right edges instead. It notices the change by itself within a few seconds.
Everyday situations
Unplugging the pinned display. While it is gone, dockpin keeps the Dock where it is now, or moves it to the display chosen under If It's Unplugged. Plug the pinned display back in and the Dock returns to it. A laptop that you sometimes use docked and sometimes alone is a typical case: pin the external display, and set the built-in display as the fallback.
Dock auto-hide. Works the same as a visible Dock: dockpin asks the Dock where it is, hidden or not. (If a future macOS removes that, dockpin falls back to looking at the screen layout, which can't see a hidden Dock; then it only moves the Dock when you pick a display.)
Displays waking from sleep. The Dock may briefly appear on another display while the displays come back, then return to the pinned one by itself.
Hot corners. Hot corners at the Dock edge of the other displays don't fire, because those moves are dropped. Hot corners on the pinned display and on the other edges work as usual.
Hovering at the very bottom. Apps on the other displays don't get hover events in the 4-point strip at their Dock edge. Clicks still go through.
Troubleshooting
The pin is crossed out, or the menu shows "⚠️ Allow Accessibility Access…". The permission is missing. Open System Settings from the menu item and turn dockpin on. If it already looks on, see the next item.
dockpin is switched on in System Settings, but it still waits for access. The entry belongs to an older copy of the app. In the list, select dockpin, click − to remove it, then use Open System Settings in dockpin (or +) to add it again and switch it on.
The Dock still moves to another display.
- Check that the pin icon is solid and Pin the Dock is checked.
- Check that you weren't holding
Option. - Make sure the checked display under Keep the Dock on is the one you want.
Seeing what dockpin did. dockpin logs what it notices and does: displays changing, the Dock moving and why, fetching it back. Run this in Terminal while reproducing the problem, and include the output in an issue:
/usr/bin/log stream --predicate 'subsystem == "io.github.esteban-eg-kim.dockpin"'Picking a display didn't move the Dock.
- If the screen was locked, it waits until you unlock.
- If the log says "giving up", three tries didn't work: pick the display again.
- If the pinned display's whole Dock edge touches another display, there is no outer stretch to push against; dockpin can't move the Dock there. Move the Dock with
Option, or rearrange displays in System Settings › Displays.
"dockpin can't be opened because Apple cannot check it for malicious software." Run xattr -dr com.apple.quarantine /Applications/dockpin.app once, or install with Homebrew.
Prefer no app at all?
macOS has one built-in way to keep the Dock in place: turn off Displays have separate Spaces (System Settings › Desktop & Dock › Mission Control), then log out and back in. The Dock and the menu bar then stay on the main display (set it in System Settings › Displays by dragging the menu bar).
The cost: only the main display gets a menu bar, a window can straddle displays, and full-screen apps take over every display instead of one. dockpin keeps separate Spaces and lets you put the Dock on any display, main or not.
Privacy
dockpin has no network code, collects nothing and stores only its own settings (which display is pinned and the menu toggles) in ~/Library/Preferences/io.github.esteban-eg-kim.dockpin.plist. It sees mouse movement and nothing else. The source is on GitHub.
Update and uninstall
brew upgrade --cask dockpin              # update
brew uninstall --cask --zap dockpin      # remove the app and its settings
By hand: quit dockpin, delete /Applications/dockpin.app, and remove dockpin from the Accessibility (or Device Control and Data Access) list.
Supported macOS versions
| Minimum | macOS 13 Ventura |
| Tested | macOS 27 on Apple silicon |
| Chips | Apple silicon and Intel (one universal app) |
macOS 13 is the floor because the menu bar menu and Open at Login rely on APIs added in 13. Versions 13–26 and Intel Macs are expected to work but haven't been tested by the author yet; reports are welcome in Issues.
Build from source
Only the Xcode Command Line Tools are needed (xcode-select --install).
git clone https://github.com/esteban-eg-kim/dockpin
cd dockpin
scripts/test.sh                 # unit tests for the edge geometry
ARCHS=arm64 scripts/bundle.sh   # → build/dockpin.app
open build/dockpin.app
Each ad-hoc build gets a new signature, and macOS ties the permission to the signature, so it asks again after every rebuild. To avoid that, sign with one self-signed code signing certificate: SIGN_ID="<name or SHA-1>" scripts/bundle.sh. See the comments at the top of scripts/bundle.sh for using a dedicated keychain, and docs/media/make.sh to regenerate the pictures and the demo video.