 xkor
winlego manual
winlego lives in the menu bar as a grid icon. Filled means it is on and allowed; hollow means it is off or still waiting for permission.
Permission
winlego needs Accessibility access to see and move other apps' windows. On first launch a window asks for it; the button opens System Settings › Privacy & Security › Accessibility (named Device Control and Data Access on macOS 27). Flip the switch next to winlego. The app notices within a second.
Nothing else is needed: no Input Monitoring, no Screen Recording. winlego does not read keystrokes and has no network code.
Layouts
Every display has a layout: a set of zones. Pick one under Layouts in the menu bar, or in Settings › Layouts, where a small preview shows each layout's shape. Landscape displays start with Wide Left (⅔ + ⅓); portrait displays start with Top + Bottom.
Built-in layouts:
| Layout | Zones |
|---|---|
| Full Screen | One zone: the whole usable screen. For small displays. |
| Halves | Left, Right |
| Wide Left (⅔ + ⅓) | Left ⅔, Right ⅓ |
| Wide Right (⅓ + ⅔) | Left ⅓, Right ⅔ |
| Thirds | Left, Center, Right |
| Grid 2×2 | Top Left, Top Right, Bottom Left, Bottom Right |
| Left + Right Stack | Left (60%), Top Right, Bottom Right |
| Center Column | Left (15%), Center (70%), Right (15%) |
| Top + Bottom | Top, Bottom |
| Three Rows | Top, Middle, Bottom |
| Tall Top (⅔ + ⅓) | Top ⅔, Bottom ⅓ |
Zones never cover the menu bar or the Dock. Settings › Layouts › Spacing adds a gap between neighbouring zones.
Layouts you draw yourself or adjust on screen appear above the built-in ones as My layouts.
Placing windows
A window is placed when winlego has put it in a zone. Four ways:
- Drag with
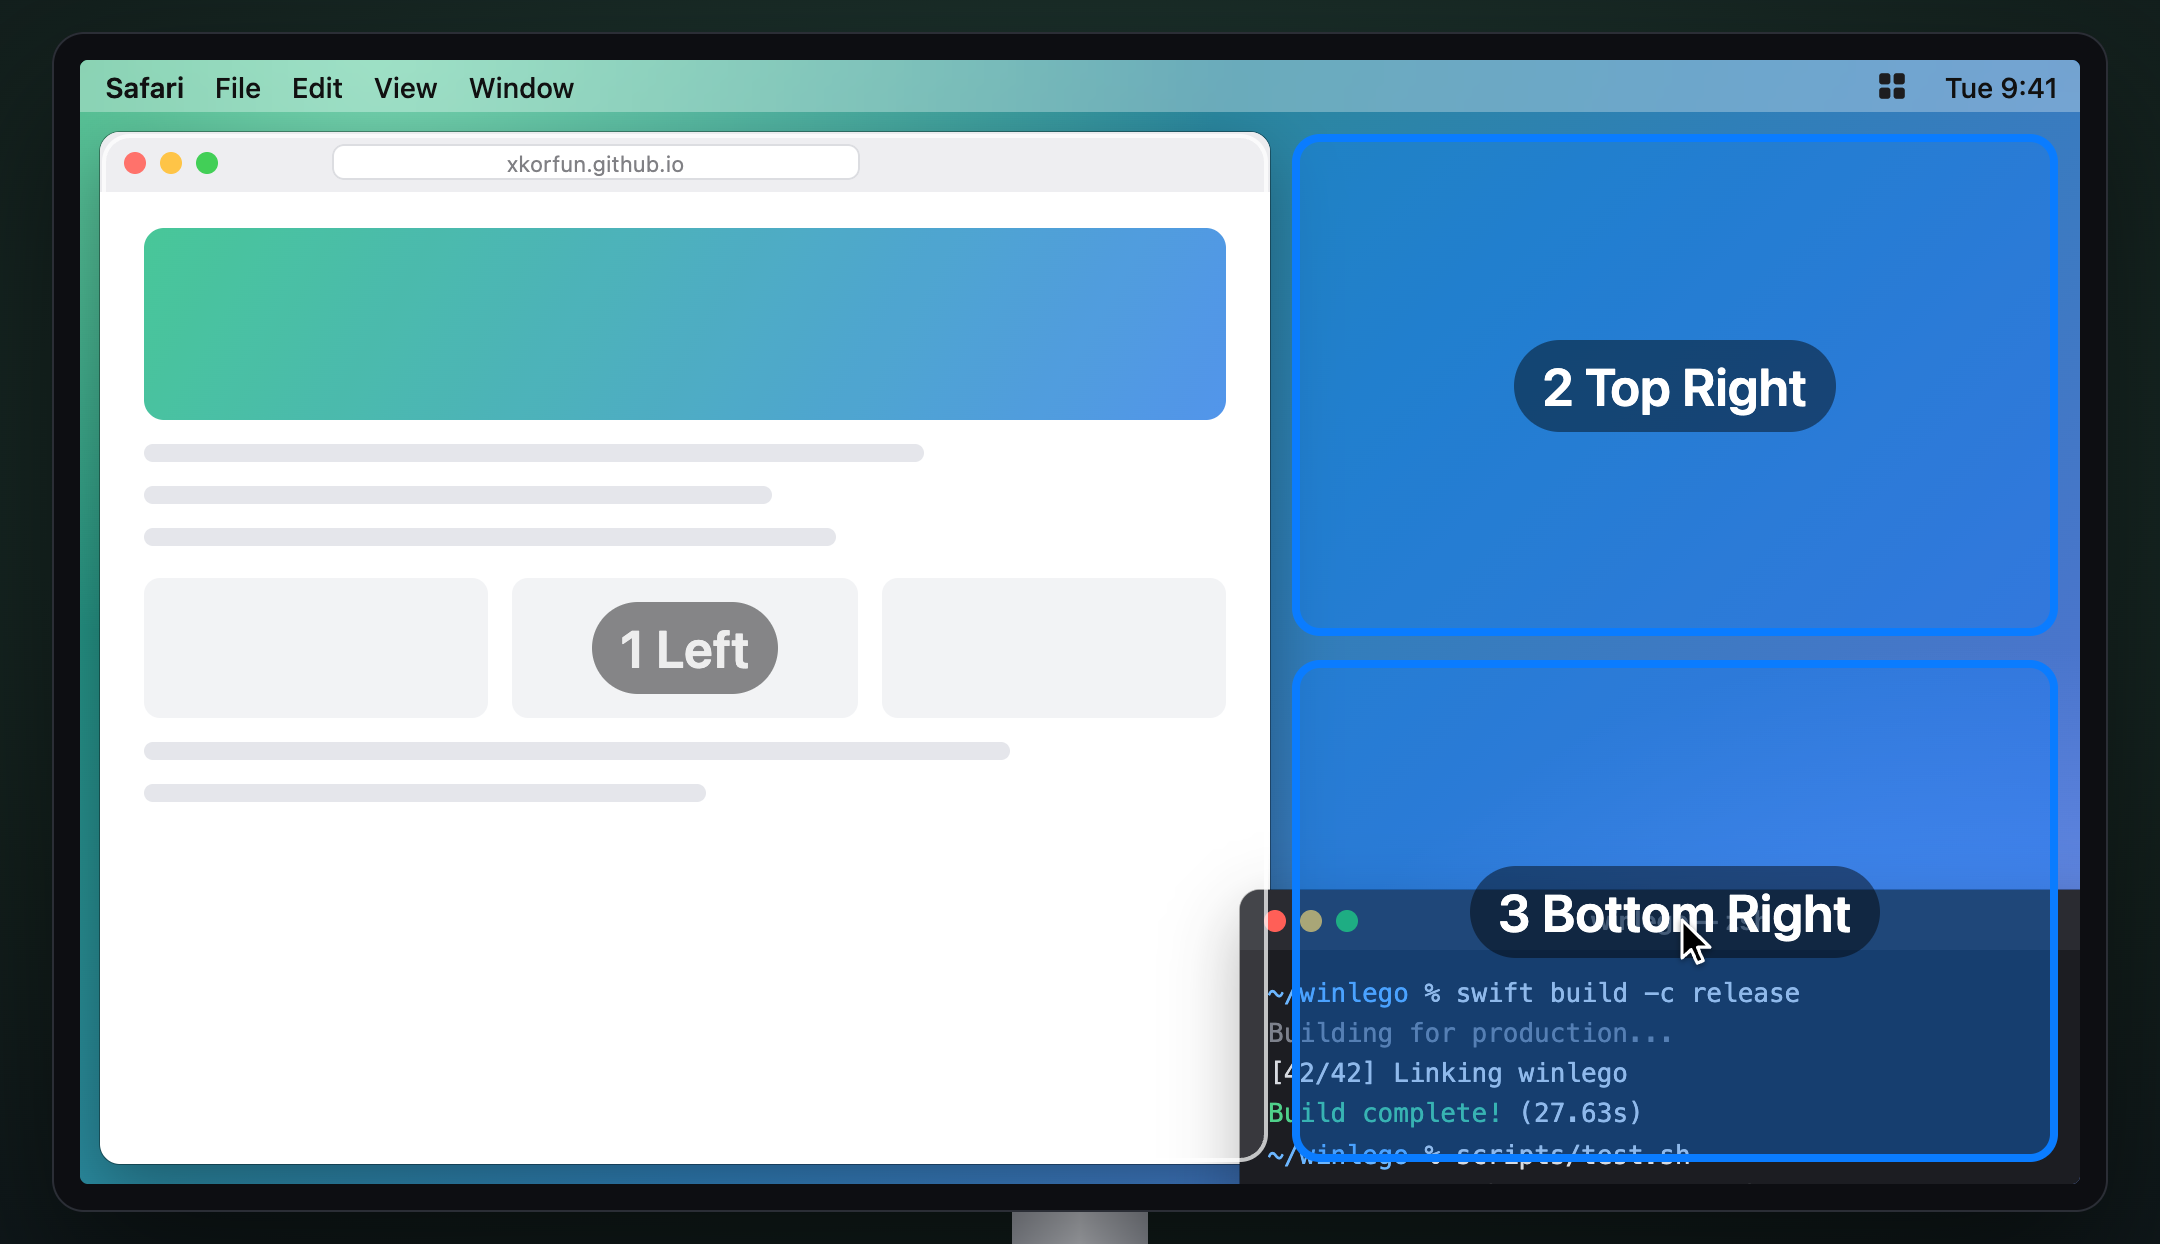
⇧. Start dragging any window by its title bar, hold⇧(you can press it mid-drag), and every display shows its zones. The zone under the cursor lights up; let go to place the window there. Settings › General can change the trigger to⌥, or to Always so zones appear on every drag. - Merge zones: add
⌃. Once the drag is under way and the zones are showing, hold⌃as well and move the cursor across neighbouring zones on one display. Press⌃only after you have grabbed the window: control-click before that is a right-click and no drag starts. (⌥is not used: macOS shows its own tiling preview on option-drag.) Each one you touch joins the selection; let go and the window fills them all. The layout itself does not change; only that window spans several zones. Dragging the boundary inside a spanned window does nothing, since the window covers both sides. - Shortcuts. By default
⌃⌥←and⌃⌥→move the focused window to the previous or next zone on its display, wrapping around. A window that is not placed yet starts from the zone it overlaps most.⌃⌥↑and⌃⌥↓move it to the same zone number on the previous or next display (left to right, then top to bottom). - Menu bar › Move Window to. Lists every display and its zones.
- Rules. See below.
winlego only places standard windows. Sheets, panels, dialogs, minimized windows and windows in their own full-screen Space are left alone. Apps with a minimum window size get as close to the zone as they can.
Keeping windows in place
Once placed, a window stays placed:
- If the app moves or resizes its own window (restoring a saved position, say), winlego puts it back a moment later.
- When a display is connected, disconnected or rearranged, or the Mac wakes up, winlego waits a moment for the system to settle, then puts every placed window back.
- Changing a display's layout re-places its windows in the new zones. A window whose zone number no longer exists goes to the last zone.
Your own actions win:
- Drag a placed window somewhere else (without
⇧) and it is released. It is yours again until you place it. ⌃⌥⌫or Release This Window does the same without moving it.- An app that keeps moving its window back, or a window that cannot be made to fit, is released rather than fought over.
Placements are remembered until the window closes or winlego quits. To have windows placed again after a restart, use rules.
Rules
A rule says: windows of this app go to this zone of this display.
The quickest way to make one: place a window where you want it and choose Remember This Window Here in the menu bar. The app's windows now open there, and Arrange All by Rules (⌃⌥↩) moves every window with a rule into place.
Settings › Rules edits them:
- Title contains limits a rule to windows whose title includes the text. A rule with a title filter wins over the app-wide rule for the same app, so you can send one project's windows elsewhere.
- Display defaults to the main display. If the chosen display is not connected, the rule uses the main display.
- Add Rule for App… lists the apps running right now.
Settings › General › Ignored apps lists apps whose windows rules never touch.
Resizing zones on screen
When two placed windows sit in neighbouring zones, the boundary between them can be dragged, like a split in a tiling window manager:
- Move the cursor onto the boundary. A coloured bar with a grip appears on it. It appears only where the boundary is visible: if another window lies on top of it, there is no bar.
- Drag. Both windows (and any others in the affected zones) follow live.
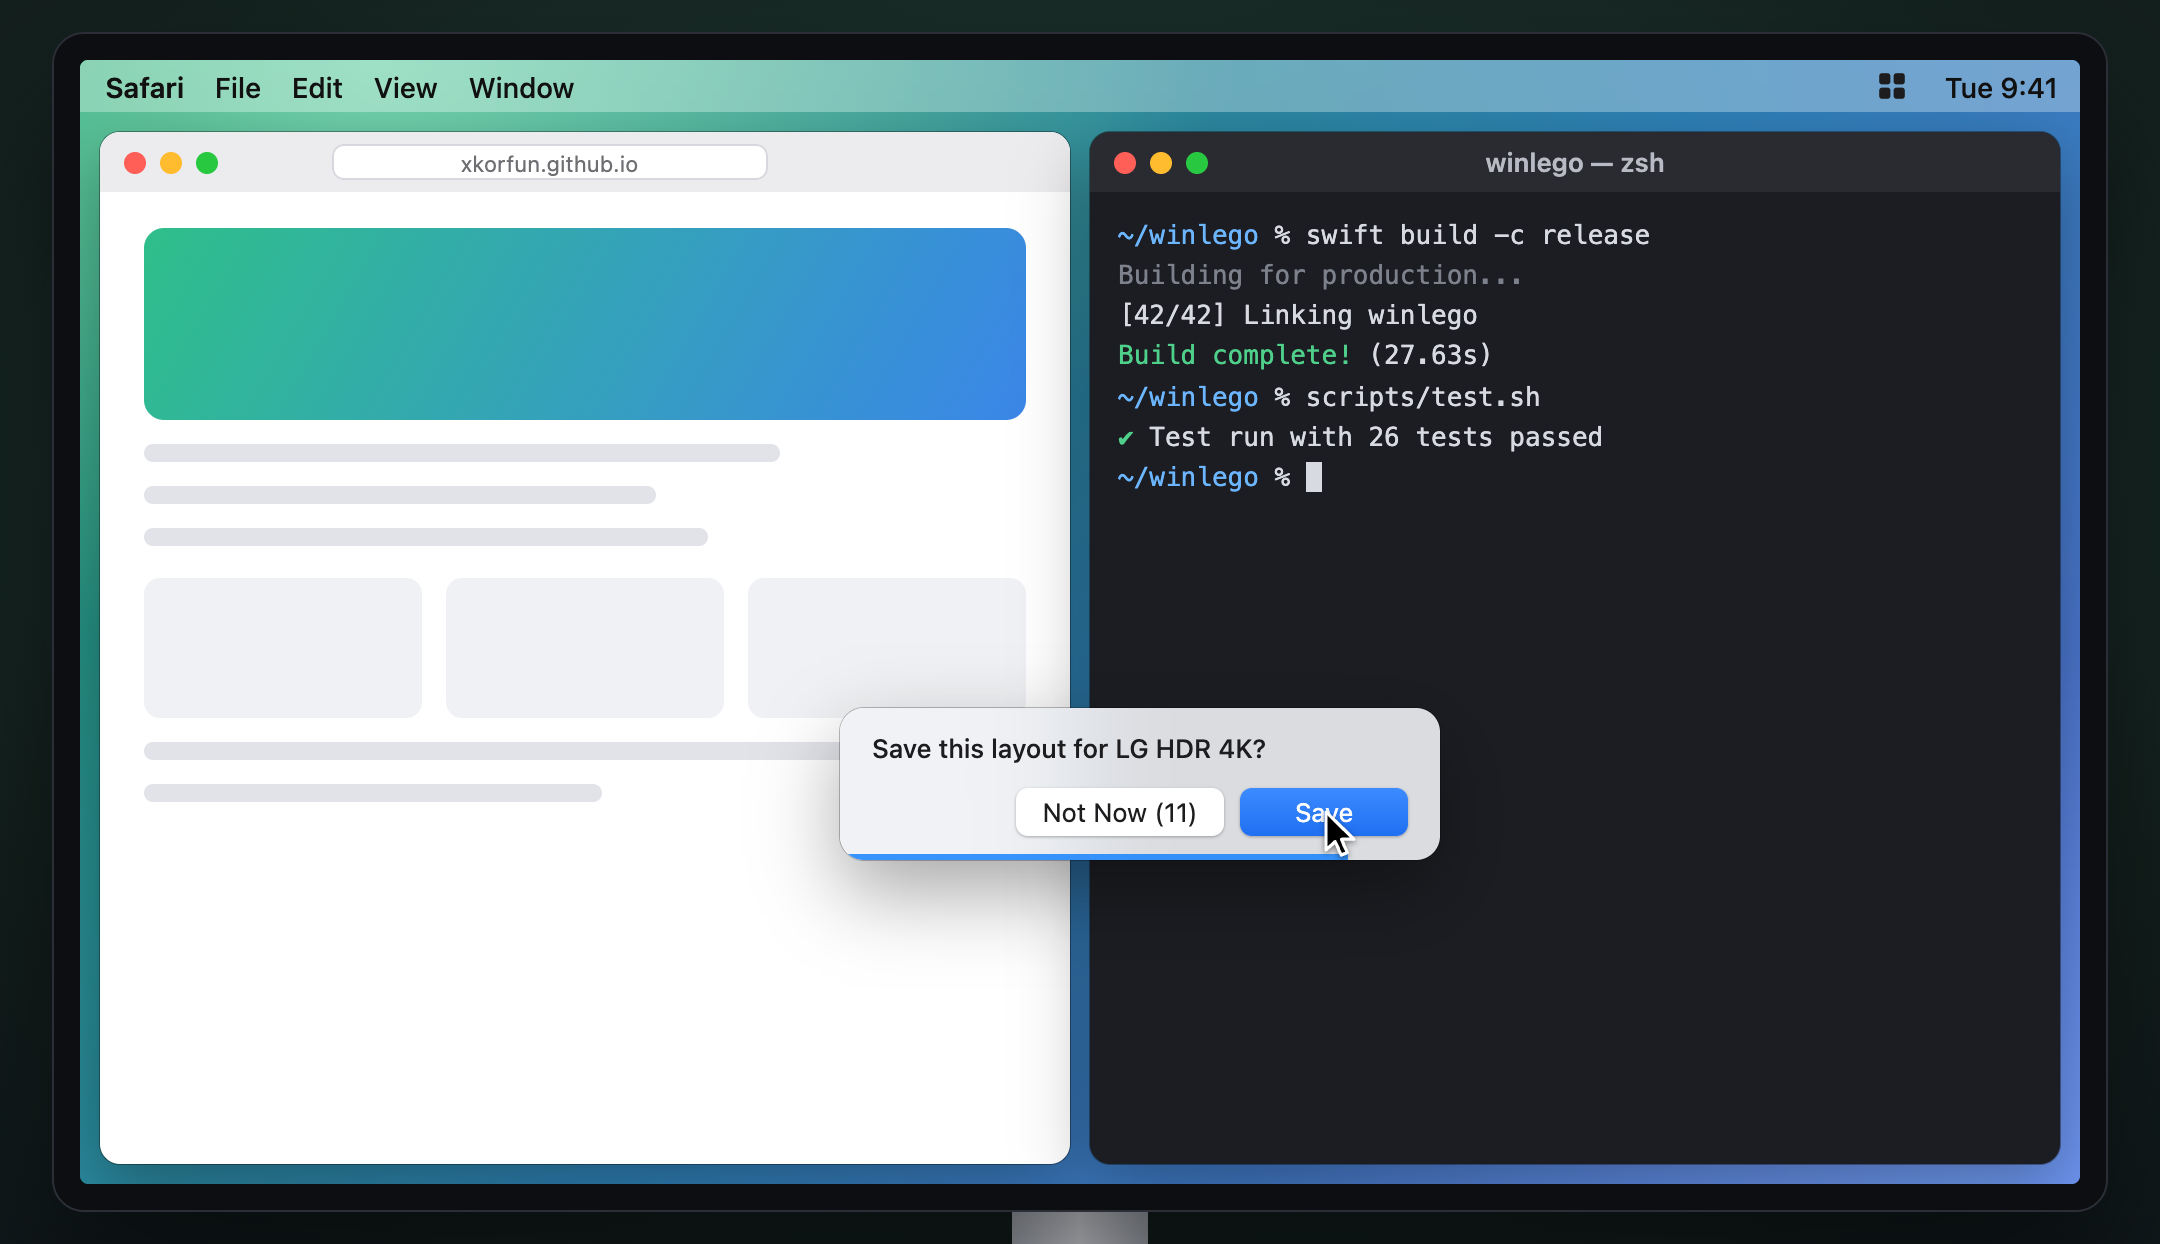
- Let go. A small prompt asks Save this layout for <display>?
- Save keeps the new proportions as that display's layout. If the display was using a built-in layout, a copy named like Wide Left (⅔ + ⅓) · LG HDR 4K is created under My layouts; from then on that copy is edited in place.
- Not Now (or letting the countdown run out; Settings › General sets how long, or turns the automatic dismissal off) leaves the windows as they are but keeps the saved layout unchanged. New placements on that display use the dragged proportions until you pick a layout again or restart.
A boundary is only draggable while there are placed windows on both sides of it.
The layout editor
Settings › Layouts › New Layout… opens the editor on a single full-screen zone; Edit… next to one of My layouts opens that layout.
- Click a zone to select it.
- Split Left | Right and Split Top / Bottom divide the selected zone in two equal parts. Keep splitting to build grids, stacks, sidebars.
- Drag the handle on any boundary to change the split.
- Remove Zone gives its space to the neighbour it was split from.
- Name the selected zone in the field on the right; unnamed zones are called Zone 1, Zone 2… in reading order.
- The Landscape / Portrait switch only changes the preview's shape.
- Save stores the layout under the name at the top. It is then available for every display.
Deleting a layout from My layouts reverts any display using it to the default.
Settings
Menu bar › Settings… (⌘,).
- Rules: see above.
- Layouts: my layouts, layout per display, spacing.
- General: drag trigger, shortcuts, ignored apps, Open at Login, permission status.
Changing shortcuts
Settings › General › Shortcuts lists every action with its keys. Click the keys, press the new combination, done. Esc cancels. The arrow button restores the default; the cross removes the shortcut. Function keys may be used alone; any other key needs ⌃, ⌥ or ⌘ so ordinary typing is never swallowed. A warning triangle means another app already holds that combination.
Language
winlego follows the system language: Korean when macOS is set to Korean, English otherwise. Layout and zone names are translated too; names you type yourself stay as typed.
Everything is stored in ~/Library/Application Support/winlego/config.json. Delete the file to start over.
Troubleshooting
Nothing happens. Check the icon: hollow means winlego is off (toggle Keep Windows in Zones) or not permitted. After an update, macOS sometimes drops the permission; remove winlego from the Accessibility list and add it again.
macOS's own tiling gets in the way. macOS 15 and later offer to tile a window when you drag it to a screen edge, and that can trigger before you reach a zone. Turn it off under System Settings › Desktop & Dock › Drag windows to screen edges to tile.
The resize cursor does not appear on a boundary. Known limitation: macOS does not let a background app change the cursor. The highlighted bar marks the boundary; dragging works regardless.
A window ends up the wrong size. Some apps enforce a minimum size or a fixed aspect ratio; winlego aligns them to the zone's top-left corner. Chromium and Electron apps occasionally resize wrongly while their accessibility "enhanced user interface" mode is on; winlego turns it off during a move.
A window keeps jumping back and forth. winlego gives up after a few rounds and releases the window. Add the app to Ignored apps if it is a habit.
Shortcuts do nothing. Another app may own the combination. winlego registers through the system hot key service, which refuses a combination that is taken, and marks the row with a warning in Settings › General. Pick another one there.
Logs. winlego writes to the unified log:
/usr/bin/log show --last 5m --info --predicate 'subsystem == "io.github.esteban-eg-kim.winlego"'(Use the full path: zsh has a built-in log command that silently does nothing.)